Snowflake french tip

Hope you’ve all had a very Merry Christmas!

This Christmas I finally met my boyfriend’s family, so for the occasion I decided to do something simple and chic with my nails đŸ™‚ I’m a firm believer that the classical french tip manicure is perfect for any occasion, and you can always add a bit of flavor to it with a simple design đŸ˜‰

Here are the items I used:

– base by Inglot (out of Nail Envy—noooOoooOOooO!)

– translucent milky color by MNY

– silver and white nail art stripers by Essence

– top coat by OPI

Firstly, create a simple french tip using the translucent white polish  and white nail art painter.

Next, create a snowflake design on your ring finger and thumb. You can be creative, but the simples way to make snowflakes is to draw a 6-point cross and then elaborate a bit on each of the branches. I made one large snowflake and several tiny ones on each of the fingers.

Now, add a bit of detail with the silver nail art striper: outline the main branches, without touching the smaller ones. This will add a bit of depth and sparkle to your design.

Now just wait for the design to completely dry, then add a top coat and you’re done! Enjoy the beauty and elegance of Winter before it melts đŸ˜‰ XOXO

Tutorial: Safari french tip

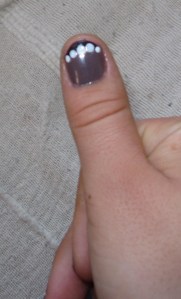
Recently I posted some pics of a design I did ages ago that I thought was very office-appropriate due to the neutral colors used, but at the same time fun and super-easy to do. I acutally got the idea for this design from kairedelysart on youtube, switched up the colors a bit and the safari french tip was born! Why safari french tip? When my boyfriend saw the design for the first time, he said it looks like the hoofs of some exotic animal :p well, i suppose so…

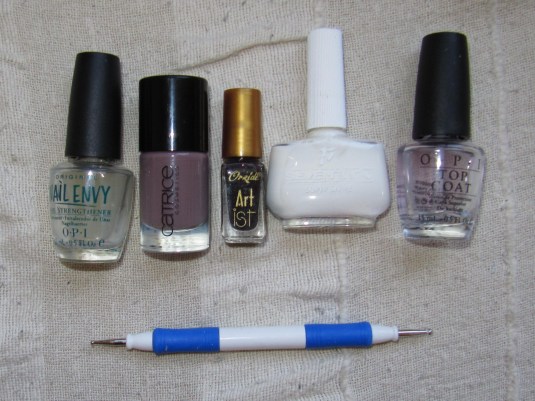
Here were the items i used to create the design:

– base coat and top coat by OPI

– taupe nail polish (200 From Dust to Dawn by Catrice)

– white nail polish (103 by Seventeen Cosmetics)

– dark brown nail art pen (30 by Orkide)

– large dotting tool


After applying a base coat, apply two coats of the taupe polish

Next, create a french tip with a black or a dark brown nail art pen.


This is a great design to practice your french tip skills, as the tip doesn’t have to be perfect! We’ll be covering it up later with white dots đŸ™‚ I acually messed up my tip on my right thumb, but it’s ok đŸ™‚

Next, we’ll be creating the dots. Take a scrap sheet of paper, dab a small amount of the white nailpolish on it, and get your largest dotting tool ready.

The tool I used here was acually sold as a paper-embossing tool in the hobby section at my local euro store, and it was like a euro for four different sizes. Super-bargain, considering dotting tools cost around 2 euros each at the nail art counters!

To make a symmetrical “hoof”, dip the dotting tool into the nailpolish and place one large dot in the middle of your nail, on the french tip line.

Next, place two smaller dots on both sides of the larger dot, along the tip line.

Finally, add two even smaller dots at the edges of the nail.

Repeat this process on the rest of your nails:

Wait 10-15 minutes for the design to dry, then appy a top coat and you’re done! đŸ˜€

Here are more pics of the design:


This design would also look awesome with other colors–if you try any out, let me know how it worked out for you! XOXO

Classic French Tip

This week I’m at a conference in Prague, so I needed to have work-approporiate nails. The universally appropriate, feminine, and gorgeous design perfect for this is of course the classic french tip.

Learning the technique of the french tip is essential if you are into nail art, since it is such an easy way to create the classical sophisticated look, as well as many other fun designs. It is a nail art staple.

This is how i create a classic white french tip.

Firstly, I apply a base coat.

From this picture you might notice that since my nails are quite short, I don’t have a natural “white tip” on my nails. That is ok, we can be tricky and draw one anyway.

The next step is optional, but I like to apply two coats of a very sheer matt pinkish-cream color as the base. This will even out the color and surface of my nails.
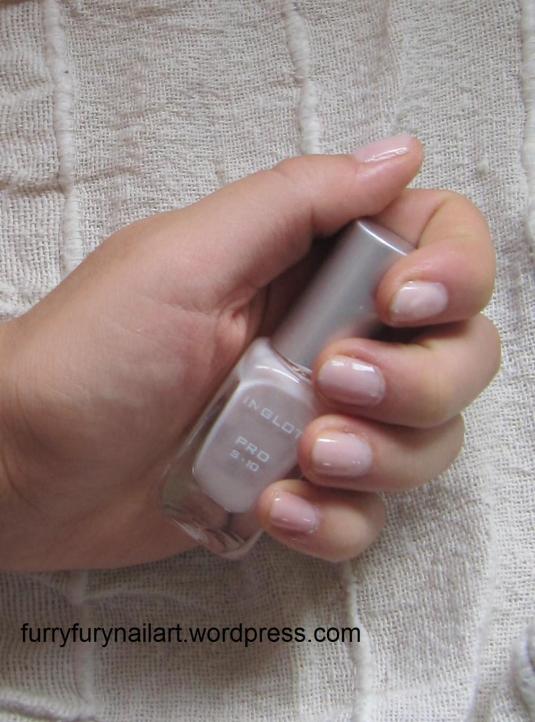
The next step is to create the actual white tip. There are several ways to do this. One is to use white nail art brushes.

Most nail art brushes are quite thin and long, like this Inglot one:

Others are shorter and more stiff, like this Catrice one:

Personally I prefer using the shorter one since I find it gives me more control and therefore a more precise application.

To draw the white part, just wipe the excess polish from the brush on the edge of the tube, beginning in one corner, draw the line. It doesn’t have to be one fluid motion, you can always draw it in strokes and correct the line as you go along. Start at the very tip and work your way up–this way you will have more room for mistakes.

For drawing with your non-dominant (usually left) hand, hold the brush firmly with your non-dominant nand, and rotate the fingers on your dominant hand under the brush.
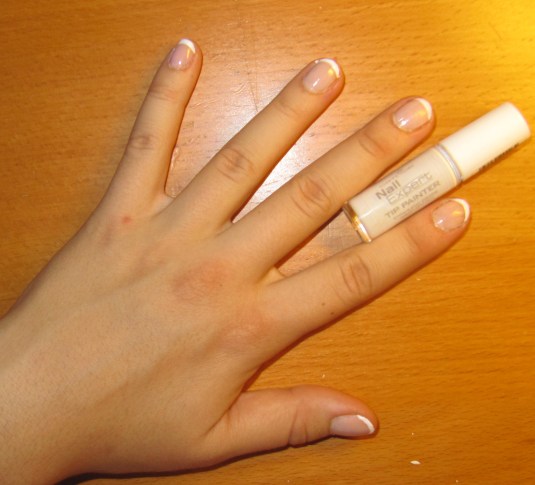
Another way of making a french tip is using special sticker strips for this.

These are available in all nail art sections at most drugstores. If you use them directly, they might adhere to your base coats and peel them off when removed. To avoid this, just stick and peel the stickers several times on the back of your hand first, to remove the excess glue.

Then, simly slide the sticker around on your nail until it fits the shape you want to achieve, and press it firmly onto the nail.

Now you can either use a tip-painter or a regular opaque white color to fill in the tip. Wait a few minutes until the polish is semi-dry, then carefully peel off the sticker.

Finally, finish off with several layers of top coat. This step is absolutely necessary for this particular design, as the white polishes are usually not formulated to last without a topcoat; they will likely start chipping off within several hours if you don’t apply it.

Enjoy your design XOXO

Request: Dr. Seuss!!

bendedspoon kindly requested a nail tutorial for her daughter, who loves Dr. Seuss!

I love Dr. Seuss as well, and one of my favorite characters is the Cat in the Hat*!

Looking at this picutre, here is the design I came up with:

Here are the items I used to create this design:

– Base and top coat by OPI

– Shimmery golden-red nailpolish (24 by Etos Long Lasting polish)

– White nailpolish (103 by Seventeen Cosmetics)

– White nail art striper (29 by Inglot)

– Dark brown nail art striper (30 by Orkide)

– toothpick

How-to:

1. After applying a basecoat, paint your ring finger white and the rest of your fingers red. I used a shimmery golden-red because it is a great color for fall, and because this will be a fun and playful design đŸ™‚

2. Using the white nail-art striper, carefully paint two horizontal white stripes on each red nail. This will represent our Cat’s famous hat! Notice that the white stripes are somewhat thinner than the red ones.

Tip: to draw a straight horizontal line across your nail, it is easier to hold the brush steady and to rotate your nail. This tequnique works especially well when you are making a design on your dominant hand.

3. The next step is to create the lovely red bow that the Cat wears around his neck, on our ring finger. Start off by making a few blobs of the red polish on your nails, remotely resembling the bow:

Then, while the nailpolish is still wet, use a toothpick to quickly manipulate the blobs into the shape of a bow. Add more blobs if necessary.

4. As a finishing touch, outline the bow details and the boundaries between the lines with a thin black or dark brown striper. Don’t worry if the lines aren’t perfect; it will only add to the cartoonish and playful effect of the design.

5. Finally, if anyone still doubts what cartoon character your nail design is representing, write “The Cat in the Hat” on your thumb:

6. Once your design is completely dry, apply a top coat and you’re done!

Here are more photos of the design!

Coming soon: Dr. Seuss toenails! đŸ˜€

* disclaimer: I don’t own any of Dr. Seuss’ characters; I just use them for inspiration đŸ™‚

Romantic grey and pink

I did this matching design a while ago and recently found the pics for it.

This design is really fun to do with any of your three favorite colors, and it’s super-easy!

Items used:

– Basecoat: Nail Envy by OPI

– Colors: Grey (Catrice 280 London’s Weather Forecast), Baby pink (Catrice 210 Just Married), White (Seventeen 103)

– Topcoat: OPI

– pink and white rhinestones

– utensils: dotting tool, toothpick, water + q-tip (for applying rhinestones)

How-to:

1. After appying a base coat to all nails, apply your base color (I used the grey for my fingernails and the pink for my toenails)

2. Use a dotting tool to make 4-5 dots in a circle where you intend to place the flower. I put two flowers on each of my fingernails, four flowers on my large toenail, and 1 flower each on the remaining flowers. Do just one nail at a time, since you don’t want the dots to dry completely just yet!

3.  Once the nailpolish has become a bit tacky, use a toothpick to drag from the center of each dot to the center of the flower. This will create a gorgeous petal shape.

4. Dot the centers of the flowers with the opposite color that you used for the petals.

5. Apply rhinestones the same color as the center of your flower, picking them up with a wet cotton bud and applying them over a swatch of clear polish or top coat. This step is optional; i only did it on my hands.

6. Once everything is completely dry, apply several coats of the top coat to protect your design. You’re done!